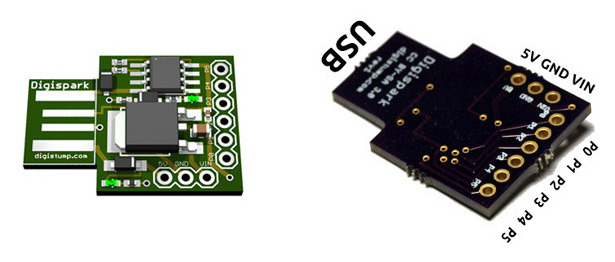
Digispark
The Digispark is a Atmel Attiny85 based microcontroller development board similar to the Arduino line but cheaper and smaller. They had an extremely successful Kickstarter campaign 2 years ago and clones are available on ebay a few euros.

They seem to now have their own ecosystem and can emulate a USB device. The USB is also used to programme the microcontroller, the same way it is done on Arduino.
Wiki pages quickref and basics have some information about pins, differences from the Arduino and limitations.
For reference, here is the schematic of digispark.
Pins
Here I need only two pins for the project : 1 for the RF receiver and the other one for the serial connection to to Raspberry Pi.
I decided to go serial instead of I²C mainly because of the asynchronous nature of the signal and to avoid polling from the I²C master (Raspberry Pi in my case). Here the digispark will simply send its data as soon as it decodes something from the RF receiver.
So PIN 0 will be the RF receiver IN while PIN 2 (default for Serial Debug) will be used for the Serial Communication. 38400 bit/s seems to be the recommended value. Fair enough.
Code is available on github :https://github.com/guillier/la_crosse_sensors
Raspberry Pi
Serial communication
In order to allow serial communication, the serial port has to be freed from any usage as a console. Once it is done (and the Raspberry rebooted), minicom can be used to check if everything is alright.
minicom -b 38400 -o -D /dev/ttyAMA0
Note that the port is /dev/ttyAMA0 while the one for the Z-Wave static controller is /dev/ttyACM0.
Storing values
Same as the values from the airpi sensors, these ones can be stored in RRD databases:
rrdtool create temperature_device33.rrd --step 300 \
DS:temperature:GAUGE:600:0:U \
RRA:AVERAGE:0.9:1:24 \
RRA:AVERAGE:0.9:6:35064 \
RRA:MIN:0.9:288:1826 \
RRA:AVERAGE:0.9:288:1826 \
RRA:MAX:0.9:288:1826